What Is the Shopify Facebook Pixel and Why Does It Matter
The Shopify Facebook Pixel, now officially called the Meta Pixel, is a small piece of JavaScript code that tracks visitor behaviour on your Shopify store and reports it back to Meta’s advertising platform. Every time a customer views a product, adds an item to cart, starts checkout, or completes a purchase, the Pixel fires an event that Meta uses to optimise your ad delivery.
Without a properly configured Shopify Facebook Pixel, Meta’s algorithm has no reliable way to know which ad clicks actually led to sales. This means your campaigns end up optimising for clicks or traffic rather than revenue, which drives up your cost per purchase and wastes ad spend. For any Shopify store running or planning to run Meta Ads, the Pixel is the foundation everything else is built on, including retargeting audiences, lookalike audiences, and accurate return on ad spend reporting.
How Do I Add Facebook Pixel to My Shopify Store
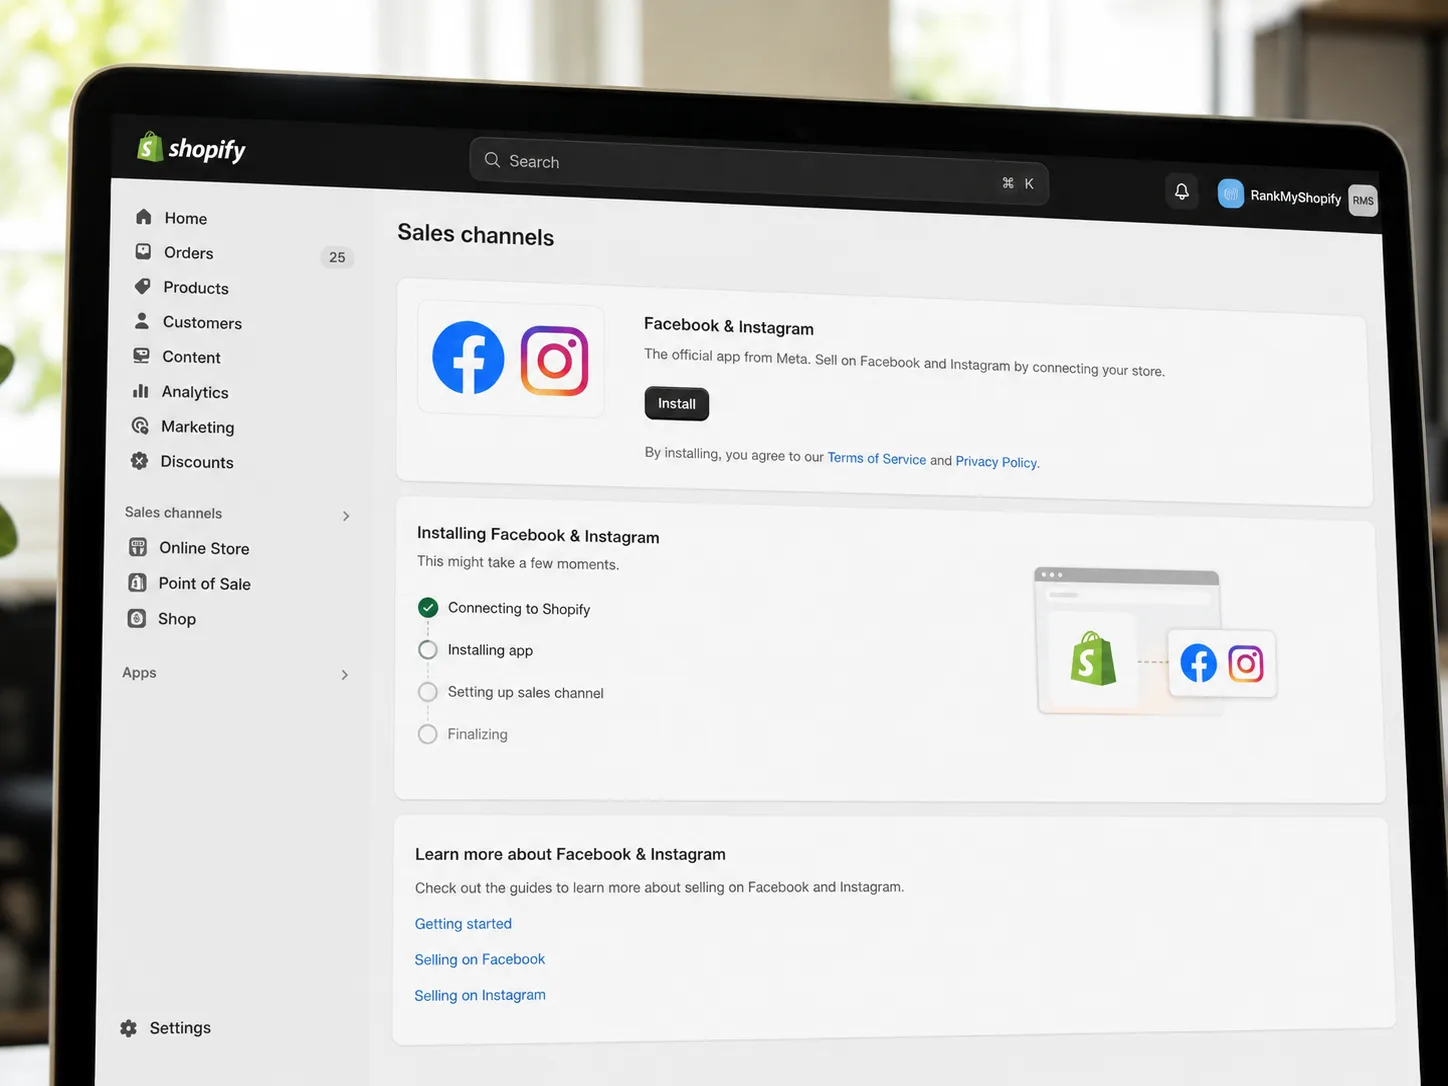
The fastest and most reliable way to add the Facebook Pixel to your Shopify store is through Shopify’s native Facebook & Instagram sales channel. This app installs both the browser Pixel and Conversions API in one connection, using a single Pixel ID, which avoids the duplicate tracking issues that come from mixing manual code with the native app.
Step 1: Install the Facebook & Instagram Sales Channel
- From your Shopify admin, go to Sales channels and click the + icon to add a new channel.
- Search for Facebook & Instagram and install the app.
- Follow the prompts to connect your Meta Business account.
Step 2: Connect or Create Your Pixel
- During setup, Shopify will check for a partner integration. Select Partner Integrations if prompted.
- Choose Conversions API and Meta pixel when asked how you want to connect, since Meta recommends this combined option for the strongest tracking and optimisation.
- If you already have a Pixel from previous campaigns, select it. If not, Shopify will create a new one for you.
Step 3: Enable Conversions API (CAPI)
- In the channel settings, look for the Conversions API option and select Set up with partner integration for the simplest path.
- This adds server-side tracking, which typically captures 15 to 25% more conversions than a browser Pixel alone, because it is not affected by ad blockers or browser privacy restrictions.
Step 4: Verify Cookie Consent Is Enabled
- Go to Settings > Customer Privacy in your Shopify admin.
- Make sure the cookie consent banner is switched on.
- This step is frequently missed, and a disabled consent banner is one of the most common reasons a correctly installed Pixel silently stops collecting data.
Step 5: Test Your Installation
- Install the Meta Pixel Helper Chrome extension.
- Visit your store and trigger a few test events, such as viewing a product and adding it to cart.
- Confirm the events appear both in the Pixel Helper and in Meta’s Test Events tool inside Events Manager.
Total setup time for a standard Shopify store is typically 15 to 20 minutes.
Why Is My Facebook Pixel Not Tracking on Shopify
If your Pixel appears installed but is not tracking events, the cause is usually one of a handful of well-known issues, based on patterns reported across the Shopify Community.
- Cookie consent is disabled. If your Customer Privacy settings do not have the cookie banner enabled, Shopify may block Pixel data collection entirely until a visitor accepts tracking.
- Your domain is blocked in Traffic Permissions. Under Events Manager, check Settings > Traffic Permissions and make sure your store’s domain is on the allowed list, not the blocked list.
- Duplicate Pixels from manual code. If a developer previously added a manual fbq snippet to theme.liquid and the native Facebook & Instagram app was installed afterwards, you likely have two Pixels firing, which inflates or confuses your event data.
- A recent theme change broke event triggers. Theme updates can silently disable Add to Cart, Search, or Add Payment Info events even when Page View events continue to fire normally, so it is worth re-testing after any theme change.
- Third-party apps are conflicting with the native channel. Other tracking or Google Tag Manager scripts can interfere with the Facebook & Instagram app’s event firing, so it is worth auditing your installed apps if problems persist after the steps above.
Facebook Pixel vs Conversions API: What Is the Difference
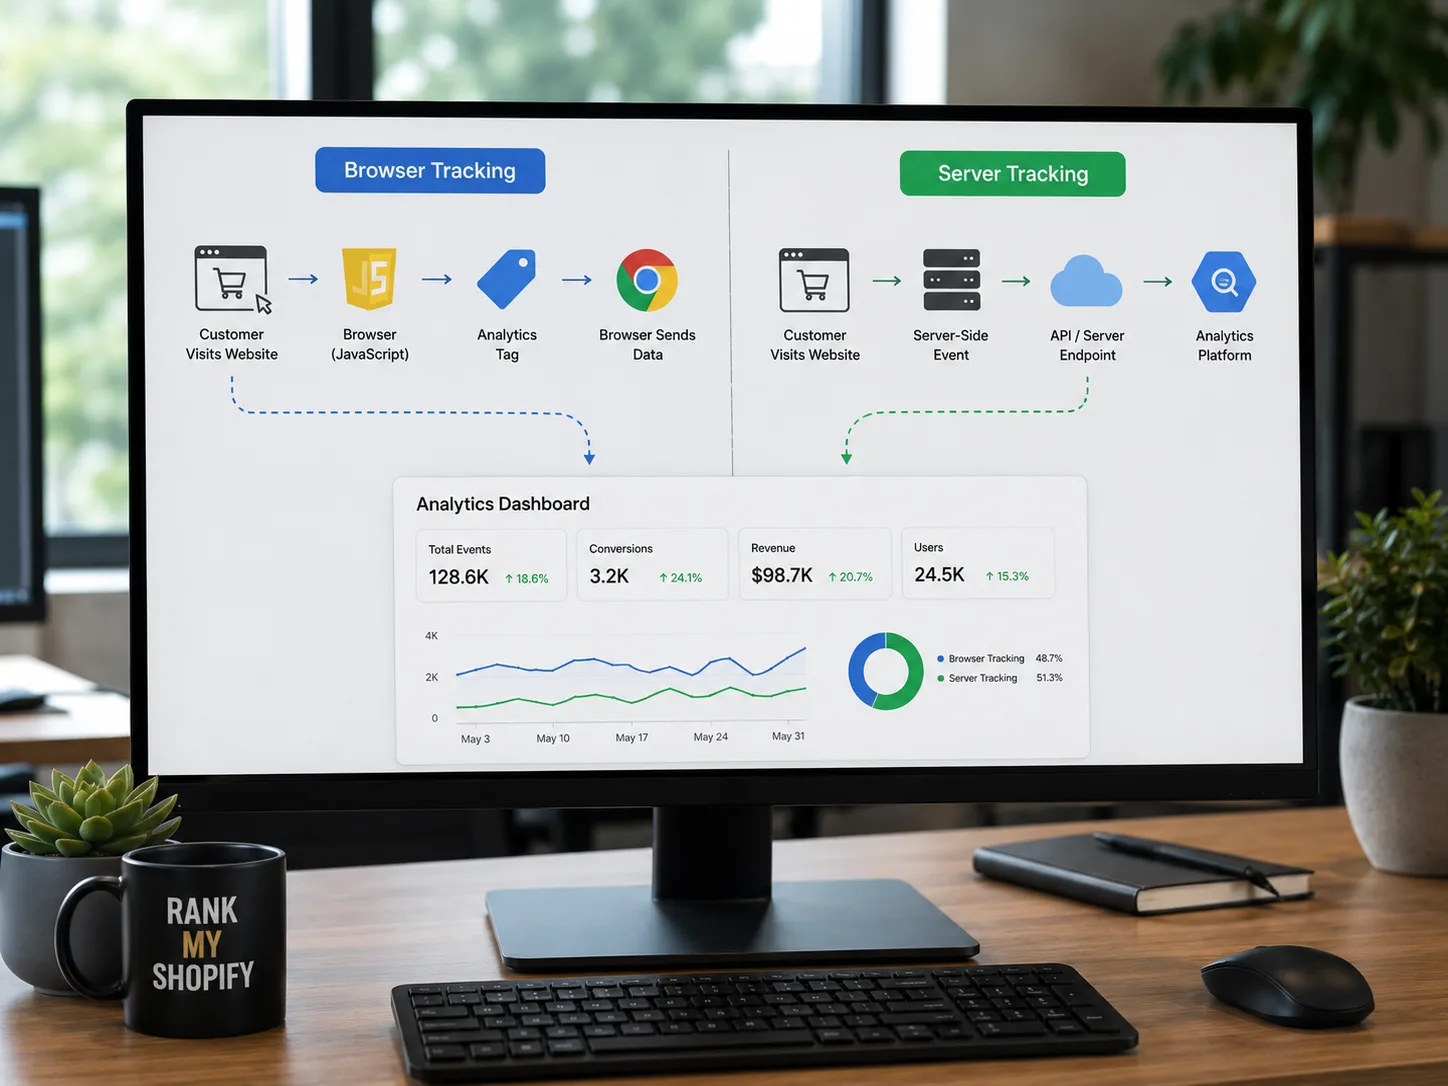
The Facebook Pixel is a browser-side tracker. It runs as JavaScript in the customer’s browser and fires events based on their session, capturing signals like cookie ID, user agent, and client-side IP. Conversions API (CAPI) runs server-to-server instead, sending event data directly from Shopify to Meta without depending on the customer’s browser.
Meta deduplicates events between the two using a shared event ID, so running both together is not redundant, it is how the matching system is designed to work. Server-only setups, without a browser Pixel, tend to plateau at a lower Event Match Quality score because they lose the browser fingerprint the Pixel captures. For most Shopify stores, the combined Pixel and CAPI setup delivered through the native Facebook & Instagram channel gives the most complete and accurate picture of customer behaviour.
At a Glance: Shopify Facebook Pixel Setup Facts
| Factor | Details |
|---|---|
| Recommended install method | Native Facebook & Instagram sales channel |
| Pixel + CAPI setup time | 15 to 20 minutes |
| CAPI conversion recovery | 15 to 25% more captured conversions vs Pixel alone |
| Meta Pixel adoption on Shopify stores | 48.2% of stores analysed use the Meta Pixel |
| Manual code use case | Headless Hydrogen storefronts, Shopify Plus checkout extensions only |
| Verification tools | Meta Pixel Helper, Meta Events Manager Test Events |
For Example: A Shopify Fashion Store Getting Pixel Data Wrong
For example, if you run a Shopify fashion store in India with 5,000 products and a Facebook Pixel that was installed manually two years ago alongside a newer Facebook & Instagram sales channel install, a Shopify SEO and tracking audit from RankMyShopify would typically uncover duplicate Purchase events, an inflated Add to Cart count, and a Customer Privacy setting that is quietly suppressing a portion of your tracking data. Fixing these issues alone can materially improve how efficiently Meta’s algorithm optimises your ad spend, before any new campaign budget is added.
Beyond the Pixel: Building a Full Shopify Growth Stack
A correctly configured Facebook Pixel is only one piece of a profitable Shopify store. Once your tracking foundation is solid, it typically pays to look at the wider marketing stack around it, including dedicated shopify SEO services to strengthen organic visibility, shopify google ads management to complement Meta campaigns with search intent traffic, a shopify facebook ads agency relationship to manage creative testing and scaling, and a shopify email marketing agency to convert the audiences your Pixel builds into repeat customers through retention campaigns.
At RankMyShopify, we work exclusively with Shopify store owners across India, the USA, and worldwide, and have done since 2009. Because we specialise only in Shopify, we understand how its native apps, theme architecture, and privacy settings interact with tools like the Meta Pixel far more deeply than a generic marketing agency.
Ready to scale your Shopify store?
Book a free 30-minute growth call with our Shopify specialists. We’ll audit your store and share an actionable roadmap — no obligations.