Great in December, Invisible the Rest of the Year: A Home Decor SEO Problem

December is lovely. Candles, tableware, gift sets and festive pieces fly out the door, and the sales report makes you smile. Then January arrives, and the orders thin out to a trickle that lasts until the next holiday rush. That pattern is common, and it is rarely about demand alone. It is usually a home decor SEO problem: the store ranks only when shoppers already know your name or when a holiday does the work for you. This post explains why that happens and how to stay visible for the other eleven months. Why Decor Demand Rises and Falls Home decor demand follows the calendar. People refresh their homes in the new year, move outdoors in spring, settle back into routines in autumn and buy gifts and festive pieces at the end of the year. Each wave has its own searches, and shoppers start looking weeks before they buy. A store that only shows up for one wave looks busy in that month and invisible in the others. The fix is not more ads in the quiet months. It is planning pages so they are ready before each wave starts. Rank Before the Demand Arrives This is the part many stores miss. Google needs time to find, test and trust a page. Technical fixes and long-tail product searches often improve within two to three months, while competitive style and category terms usually take six to twelve. A festive page published in November is already late. Think of each season as a deadline that sits months earlier than the sales peak. The calendar below shows the pattern, using the northern hemisphere. For Australia and South Africa, shift each season by six months. Season What shoppers want Prepare by January to March Refresh and organise: storage, bedding, calm and minimalist looks October to November April to June Outdoor living: planters, outdoor cushions, garden lighting January to February July to September Back to routine: home office, kids’ rooms, cosy textures April to May October to December Gifting and festive: candles, tableware, gift sets July to August Because it is late October as you read this, the January to March pages should be going live now. Keep Seasonal Pages on the Same URL A common mistake is to build a new Christmas page every year. Each new page starts from zero, with no history and no links. A better approach is to keep one evergreen URL for each seasonal collection and refresh it before the season returns. Update the products, the intro and the images, and let the page build strength year after year. The same logic applies to products you stop selling. Redirect them to the closest alternative or to the parent collection, so the rankings they earned are not wasted. Build Pages That Work Year-Round Holiday pages help, but they cannot carry a whole year. Many of the searches that bring in steady orders have nothing to do with a holiday. People look for a style like “japandi bedroom decor,” a room like “hallway runner rug,” or a problem like “how to style a bookshelf.” Those searches are available all year, and each deserves its own page: a style collection with a short guide to the look, a room collection that pulls together products from several categories, and a styling guide that links straight to what you sell. Build collections only where there is real demand and enough products to fill the page, because thin collections with two or three items usually do more harm than good. Fix the Words Shoppers Cannot Search Lovely product names feel right for the brand, but they rarely match what people type. “The Willow” tells nobody what it is. You do not have to drop it. Keep the name and add the words shoppers use, such as “The Willow Rattan Pendant Light, Large.” You keep the brand feel and gain a page that can rank. The same goes for descriptions copied from a supplier. If dozens of stores use the same text, Google has no reason to prefer yours. Write your own, covering size, material, care and how to style the piece. Write Down the Details Buyers Search For Decor shoppers measure a space, compare colours against a sofa and check what a rug is made of before they buy. Searches reflect that: “linen cushion cover 50×50” or “rattan pendant shade large.” Put exact dimensions, materials, colours and finishes into titles and copy. These detailed searches often convert well because the shopper knows what they want. Treat Your Photos as an SEO Asset Decor shoppers browse with their eyes, and Google Images, Google Lens and Pinterest can send steady traffic to stores that handle images well. Give files descriptive names instead of “IMG_4521,” write alt text that describes the scene, and compress images so pages load fast on a phone. Heavy lifestyle photos are a common cause of slow pages, which is why our Shopify speed optimization work often starts there. Plan Styling Guides Months Ahead Guides and lookbooks answer the questions that inspire a purchase: how to style a small living room, how to layer a bed, how to set a table. Plan them on the same calendar as your seasonal pages, and link each one to the products it features. Our Shopify content marketing team builds these around real search demand, so each guide has a reason to rank. Use Email to Fill the Quiet Months Search takes time to build, and email can help in the meantime. People who browsed in December and did not buy can hear from you again with a reminder, a styling idea or a new arrival. Home decor has a long thinking time, so a short, timely message can bring someone back days later. A tidy email and SMS marketing setup does this in the background. Earn Links From Places Decor Shoppers Read Design blogs, gift guides and local press all signal that your brand is real, and they help seasonal pages rank.
Shopify AI Search Optimisation: How to Get Recommended by ChatGPT and Google AI Mode

Shoppers no longer start every search on Google’s ten blue links. More of them now ask ChatGPT for “the best linen shirts under £60”, ask Google’s AI Mode to compare running shoes, or ask Copilot which serum suits sensitive skin. These assistants return a short list of products and a few stores. If your Shopify store is not on that list, the shopper never sees you. Shopify AI search optimisation is the work of making your products and pages easy for these AI assistants to find, understand and trust, so they recommend you when a shopper asks. The good news: most of it builds on the same foundations as solid Shopify SEO. In this guide, we explain how products actually reach AI assistants, what data they rely on, and the practical steps to take first. What Is Shopify AI Search Optimisation? AI search optimisation (sometimes called GEO, generative engine optimisation, or AEO, answer engine optimisation) means preparing your store so that AI-powered search tools can use it as a source. For a Shopify store, that covers three things: Product visibility: your products appear as shoppable cards when someone asks an assistant for a product recommendation. Brand mentions: your store is named when someone asks “where should I buy…” or “what is the best brand for…”. Citations: your guides, sizing pages and FAQs are linked as the source behind an AI answer. Each of these draws on slightly different data, which is why it helps to understand the routes your store’s information takes before you start changing things. How Shopify Products Reach AI Assistants There are three main routes. Strong stores keep all three accurate and consistent with each other. 1. Shopify Catalog and Agentic Storefronts Shopify now syndicates products to AI channels through its own catalog. According to Shopify’s Help Center, Agentic Storefronts “lets customers discover and purchase your products in AI channels” and is active by default for eligible stores. Supported channels include ChatGPT, Google AI Mode and Gemini, Microsoft Copilot and Meta’s AI surfaces. You can choose which channels to sell on from Sales channels > Agentic in your Shopify admin. Shopify’s own guidance on ChatGPT shopping adds some basic eligibility rules: your store cannot be password-protected, every listing needs a title and at least one image, and free products are excluded. 2. Google Merchant Center feeds Google’s AI Mode, AI Overviews and Gemini draw on product data that retailers send through Google Merchant Center, usually via the Google & YouTube app on Shopify. That feed carries price, stock, GTINs, variants and images. If you already run Shopping ads, you have this feed, but it is worth checking its quality. Our guides to Google Shopping setup on Shopify and product feed optimisation walk through the details. 3. Crawlable web pages AI search tools also read your public pages, the same way search engines do. Google uses Googlebot. OpenAI’s crawler documentation says OAI-SearchBot “is used to surface websites in search results in ChatGPT’s search features”, and that sites which block it “will not be shown in ChatGPT search answers”. Perplexity and Copilot rely on their own crawlers and on Bing’s index. This route matters most for brand mentions and citations. When a shopper asks a comparison question, assistants look for pages that answer it clearly: buying guides, sizing charts, ingredient explanations and honest comparisons. Step 1: Check That AI Assistants Can Access Your Store Before you optimise anything, make sure nothing is blocking access. Agentic Storefronts: open Sales channels > Agentic and confirm the channels you want are switched on. robots.txt: visit yourstore.com/robots.txt and check that Googlebot, Bingbot and OAI-SearchBot are not disallowed. Some apps and custom robots.txt.liquid edits block AI crawlers without the owner realising. Password and geo blocks: remove storefront passwords once you launch, and check that bot-protection or geo-blocking apps are not stopping legitimate crawlers. Indexing: Google says pages need to be “indexed and eligible to be shown in Google Search with a snippet” to appear as links in AI features. Check the Pages report in Search Console for important product and collection pages that are excluded. Duplicate URLs are a common hidden problem on Shopify. If you have not cleaned them up, read our guide on fixing duplicate content on Shopify. Step 2: Make Your Product Data Complete and Specific AI assistants match products to very specific requests. A shopper might ask for “a waterproof hiking jacket for women, packable, under $150”. The assistant can only recommend your jacket if your data says it is waterproof, packable, designed for women and priced under $150. Write descriptive product titles Lead with what the product is, then the key attribute. “Aurora Women’s Packable Waterproof Hiking Jacket” gives an assistant far more to work with than “Aurora Jacket”. Keep brand names, but do not rely on them alone. Fill in every attribute you can GTINs and barcodes so your product can be matched reliably across sources. Variants with clear size, colour and material values rather than codes. Specifications such as dimensions, weight, ingredients, materials and care instructions. Shopify recommends technical specs, sizing guides and care instructions because they help AI tools tell similar products apart. Product type, tags and metafields that use the words shoppers actually use. Write descriptions in full sentences Keyword lists do not help. Explain who the product is for, what problem it solves and how it compares with alternatives. This is the same work that drives good rankings on Google. Our guide to Shopify product page SEO shows how to structure it, and our Shopify keyword research guide helps you find the language your customers use. Collection pages matter too. A well-written collection page with a clear introduction and buying advice is often what an assistant cites for broad “best X” questions. See how to optimise Shopify collection pages. Step 3: Keep Structured Data Accurate and Consistent Structured data (schema markup) labels your price, availability, brand and reviews in a format machines can read. Google is clear that you do not need any
Stop Losing Sales: Shopify CRO Strategies Every Store Owner Should Know
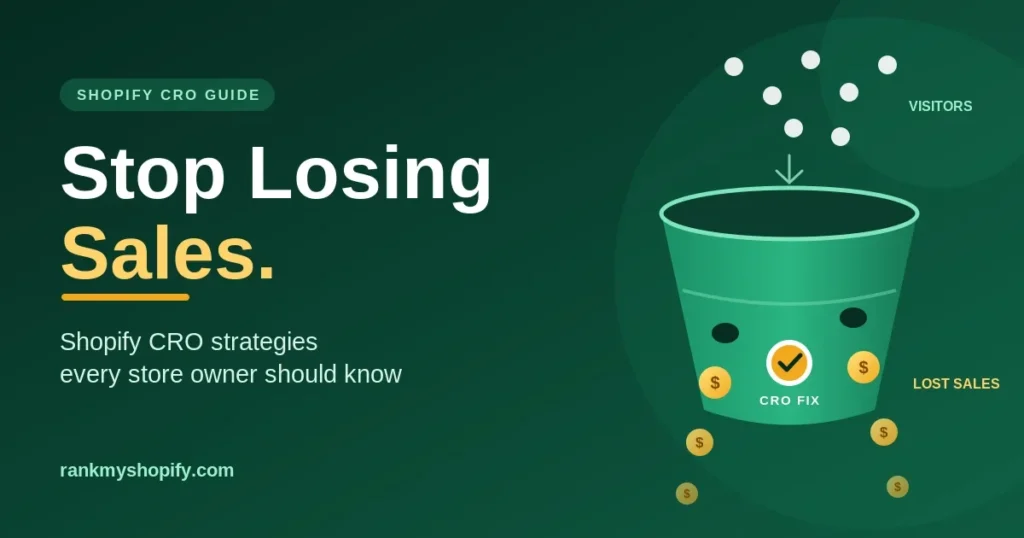
Most Shopify stores are not short on traffic. They are short on a system that turns that traffic into orders. You may be paying for ads, publishing content and ranking for good keywords, yet the orders do not follow. Every visitor who leaves without buying is a sale you already paid to earn and then lost. That is the problem Shopify CRO (conversion rate optimisation) solves. Instead of spending more to bring in extra visitors, you fix what happens after they arrive. In this guide, we walk through the strategies every store owner should know, from product pages to checkout, and show you where most stores quietly lose sales. What Is Shopify CRO and Why Does It Matter? Conversion rate optimisation is the practice of increasing the share of visitors who complete a goal on your store, usually a purchase. If 100 people visit and 2 buy, your conversion rate is 2%. CRO is the work of moving that number up without simply buying more traffic. This matters for three reasons: It lowers your cost per sale. The same ad spend produces more orders when more visitors convert. It makes every channel work harder. Better conversion lifts Shopify SEO, paid ads and email at the same time. It compounds. A fix to your product page template helps every product that uses it. Our Shopify CRO service is built on exactly this idea: audits, testing and checkout fixes that turn more of your existing traffic into revenue, with no extra ad spend required. Step 1: Find Where You Are Actually Losing Sales Before changing anything, find the leaks. Guessing is the most common CRO mistake. Store owners redesign a homepage because it feels dated, while the real problem sits in the cart. Start by mapping your funnel in Shopify analytics and GA4: Landing page to product page Product page to add to cart Cart to checkout started Checkout to order completed The step with the biggest drop is where you start. If few visitors add to cart, work on the product page. If many add to cart but few begin checkout, look at shipping costs and cart design. If they reach checkout and leave, the problem is trust, friction or payment options. Accurate data comes first. If your tracking is broken, your conclusions will be wrong. Our analytics and reporting work focuses on clean tracking across every channel, so you know what is really driving revenue. A structured Shopify website audit is also a good way to check what to fix and what to track before you start testing. Step 2: Fix Your Product Pages First The product page is where the buying decision happens, so it deserves the most attention. Here is what to check. Lead with a clear, benefit-focused headline. Shoppers should understand what the product is and why it is worth buying within a few seconds. Use strong, honest imagery. Show the product from several angles, in use, and at scale. For fashion and beauty stores, this includes fit, texture and real-life photos. If your store sells in these categories, our Fashion & Apparel and Beauty & Skincare pages explain how we approach them. Write descriptions that answer questions. Cover size, materials, ingredients, delivery and returns. Every unanswered question is a reason to leave. Put social proof close to the buy button. Reviews, ratings and customer photos reduce doubt at the moment it matters most. Make the call to action obvious. Your add-to-cart button should stand out, stay visible on mobile, and use clear wording. Show delivery and returns information upfront. Hidden costs and unclear policies are among the most common reasons shoppers abandon a purchase. Product page quality also affects search visibility, so it helps to treat CRO and SEO together. Our guide on Shopify product and collection page SEO fixes shows how better page structure can support both rankings and conversions. Step 3: Speed Up Your Store A slow store loses shoppers before they see a single product. Mobile visitors, who often browse on weaker connections, are the least patient. Common speed problems on Shopify include oversized images, too many apps loading scripts, heavy themes and unoptimised fonts. Fixing them improves the experience for everyone and supports your search performance as well. Start with these basics: Compress and correctly size images Remove apps you no longer use Limit heavy sliders, pop-ups and animations Test your key pages on a real mobile device If your store feels sluggish, our Shopify speed optimization service targets exactly these issues. Faster pages mean fewer people leaving before they have had a chance to buy. Step 4: Make Mobile Shopping Effortless For many Shopify stores, most visitors arrive on a phone. A desktop-first design that merely shrinks down will frustrate them. Review your store on mobile with a critical eye: Are buttons large enough to tap easily? Is the menu simple to use with one hand? Does the add-to-cart button stay visible while scrolling? Do forms use the right keyboard type for emails and phone numbers? Can shoppers use fast options like Shop Pay and other wallets? Small frustrations add up quickly on a small screen. Smoothing them out is one of the quickest ways to recover lost sales. Step 5: Reduce Cart and Checkout Friction Cart and checkout are where interested shoppers become customers or walk away. Even a motivated buyer will leave if the process feels long, confusing or risky. Show total costs early. Surprise shipping fees and taxes are a leading cause of abandoned carts. Be transparent before checkout begins. Offer the payment methods your customers expect. This includes cards, digital wallets and local options for the markets you sell in. Remove unnecessary fields. Ask only for what you need to complete the order. Add trust signals. Secure payment badges, clear return policies and visible contact details help nervous buyers feel safe. Use a simple cart. Show product images, quantities and a clear checkout button. Avoid distractions that pull shoppers away from finishing. For larger brands, Shopify
Shopify Product and Collection Page SEO: 12 Fixes With Before/After Examples

Most Shopify stores do not need more pages, they need better ones. A few small fixes on your collection and product pages can make it easier for Google to understand what you sell and easier for shoppers to buy it. That is the idea behind Shopify product and collection page SEO: fix the pages that already exist, in the order that matters most. This guide walks through 12 fixes, each with a before and after example. The examples are illustrations for a fashion and home store, not real client data. It is written for store owners in India, the USA, the UK, Australia and Canada. What Is Shopify Product and Collection Page SEO? It is the work of making your collection pages and product pages clear, useful and easy for search engines to crawl, so they rank for what shoppers search and convert the visitors they get. It covers titles, copy, images, structure, internal links, schema and speed. Collection pages usually target broad searches such as “linen shirts for men”, while product pages target a specific item. Both need to work together. Which Pages Should You Fix First? For Shopify product and collection page SEO, fix your collection pages first, then your best-selling products. Collections match broader searches and pass visitors to many products, so one improvement helps many sales. Start with the five collections that bring in the most revenue, then move down the list. For example, imagine a home decor store in the UK with 600 products and 40 collections. Rather than rewriting every product, the owner improves the five biggest collections and their top 20 products first. That small batch usually covers most of the revenue, and it gives the team a tested method to repeat on the rest. Collection Page Fixes Fix 1: Add a useful intro above the product grid A bare grid of products gives Google very little to read. Add a short intro written for shoppers. Before: Page title “Summer Dresses”, then 24 product tiles and nothing else. After: A 100 to 200 word intro covering fabrics, occasions, sizing help and links to related collections, with the products directly below. Fix 2: Rewrite the title tag and meta description Titles that only repeat the collection name waste your best signal. Before: “Dresses | Store Name” After: “Women’s Summer Dresses: Linen and Cotton | Store Name”, with a meta description of about 150 to 160 characters that mentions delivery or returns and invites the click. Fix 3: Link to the clean product URL A product can load at /products/blue-dress and at /collections/dresses/products/blue-dress. Shopify normally points the canonical tag to the clean version, but your own links should do the same. Before: Collection tiles link to /collections/dresses/products/blue-dress. After: Tiles link to /products/blue-dress. This usually needs a small theme edit, so ask your developer. Fix 4: Control tag and filter pages Tags and filters can create thousands of thin, near-duplicate URLs. Before: Pages such as /collections/dresses/red+cotton+short are all open to indexing. After: Only the pages that match real searches are indexed. Review these in Google Search Console and Screaming Frog, and test any robots.txt.liquid or noindex change before you publish it. Fix 5: Add links to related collections Shoppers and Google both need next steps. Before: The page is a dead end. After: A “Shop by occasion” or “Shop by fabric” block links to related collections, such as wedding guest dresses or linen dresses. Our guide to Shopify collection page SEO for large catalogs goes deeper on scaling this. Product Page Fixes Fix 6: Write a clear product title Codes and internal names do not help shoppers or search. Before: “Maxi Dress 04” After: “Linen Wrap Maxi Dress in Sage Green” Fix 7: Replace thin or copied descriptions Supplier text is used by many stores, and a one-line description says almost nothing. Before: “Effortless beauty for every occasion.” After: Fabric, length, fit, sizing guidance, care instructions and who it suits, written in your own words and in short paragraphs or bullets. Fix 8: Use one product page for all variants Duplicate pages for each colour or size split your signals. Before: Three pages for the same dress, one ending in “-copy”. After: One product with colour and size options, and redirects from the duplicates to the main page. Fix 9: Fix image names and alt text Images help rankings and accessibility. Before: File name IMG_0432.jpg and alt text “Product”. After: File name sage-green-linen-wrap-maxi-dress.jpg and alt text describing what the image shows, such as “Sage green linen wrap maxi dress, front view”. Fix 10: Add reviews and valid Product schema Review stars and structured data can help your listing stand out. Before: No ratings, and schema missing price or availability. After: Real customer reviews and valid Product schema with price, stock status and rating, tested in Google’s Rich Results Test. Only mark up reviews that are genuine. Fix 11: Show shipping, returns and sizing near the buy button Shoppers decide quickly, and hidden policies lose sales. Before: Delivery information sits only in the footer, and two pages state different free shipping thresholds. After: A short delivery estimate, returns line and size guide link sit under the buy button, and every page uses the same threshold. Fix 12: Speed up the page Slow pages hurt both rankings and orders. Before: A 3 MB hero image, five apps loading scripts and a lazy-loaded main image. After: Compressed images, unused apps removed, and the main image loading first. Check results in PageSpeed Insights. For hands-on help, see our Shopify speed optimization service, and our Shopify product page SEO page for what a strong product page includes. How Do Collection and Product Pages Work Together? Collection pages attract the broader searches, and product pages turn that interest into an order, so each one needs to send shoppers to the other. Strong Shopify product and collection page SEO treats the two as one system, not as separate jobs. Collections link to products using clean /products/ URLs Product pages link back
A Practical Shopify Website Audit: What to Check, Fix and Track
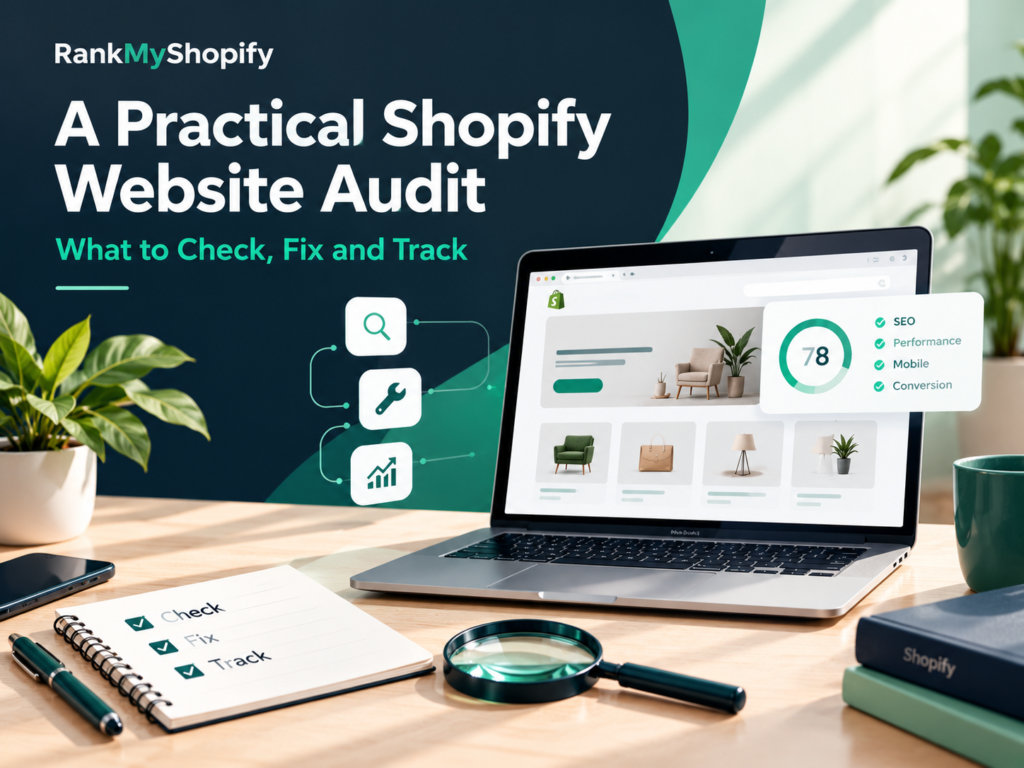
An audit is only useful if it ends with a ranked to-do list, not a long report that nobody acts on. The goal is to find what stops shoppers and Google from reaching, trusting and buying from your store, then fix the biggest issues first. That is the purpose of a practical Shopify website audit: a repeatable review of your SEO, speed, content, conversion and tracking. This guide is written for store owners in India, the USA, the UK, Australia and Canada. It follows three steps: what to check, how to fix it, and what to track afterwards so you can prove the work paid off. What Is a Shopify Website Audit? It is a structured review of your store that finds problems and missed opportunities across the areas that affect traffic and sales, and it ends with a prioritised list of fixes, each with a reason and an owner. Area What you check Free tools SEO and indexing Crawl errors, duplicate URLs, titles, canonicals Google Search Console, Screaming Frog Page quality Collection and product copy, images, schema Rich Results Test Speed Core Web Vitals, apps, scripts, images PageSpeed Insights Content and links Blog posts, internal links, thin pages Search Console, GA4 Conversion Mobile layout, shipping, checkout, trust Your own testing, GA4 Tracking Key events, purchases, duplicate events GA4, Tag Assistant What Should You Do Before You Start? Record a baseline first, or you will not know whether your fixes worked. Take 30 minutes to do this: Export Search Console data (clicks, impressions, average position) for the last 3 months. Note your GA4 numbers: organic sessions, orders and key events. Pick 3 to 5 goals, such as more organic orders or fewer abandoned carts. Start a change log with the date, page, what changed and why. Save a crawl from Screaming Frog (the free version covers up to 500 URLs). How Do You Audit Your Shopify SEO and Indexing? Start by confirming Google can find and index your important pages. If it cannot, nothing else matters. Pages report in Search Console: look at which pages are indexed and why others are not Sitemap: Shopify creates one automatically, so check it is submitted and has no errors site: search: search site:yourstore.com to see whether key pages appear robots.txt: you can edit it through robots.txt.liquid, so check you are not blocking useful pages Duplicate URLs: a product can load at /products/blue-shirt and at /collections/summer/products/blue-shirt. Shopify normally points the canonical to the clean version, but theme edits and apps can break this, and internal links should use the clean /products/ URL Tag and filter pages: these can create thin, near-duplicate pages if left open to indexing Titles and meta descriptions: look for missing, duplicated or truncated ones For ongoing support, see our Shopify SEO service. How Do You Audit Collection and Product Pages? Collection pages usually bring the broadest searches, so review them first. A bare grid of products gives Google little to work with. Collection page checks A short intro (around 100 to 200 words) written for shoppers One main keyword and a clear title tag Links to related collections and key products Compressed images with useful alt text Product page checks Your own description, not supplier text, with fabric, size, fit and care details Variants (size and colour) pointing to one main product URL Clear shipping and returns information near the buy button Review stars and valid Product schema, tested in Google’s Rich Results Test Our guide to Shopify collection page SEO for large catalogs and our Shopify product page SEO page cover these in more depth. For example, imagine a home decor store in the UK with 600 products. A Shopify website audit often finds that half its collections have no intro copy, several tag pages are indexed, and product descriptions are copied from suppliers. Those are fixable, and they are usually worth fixing before writing new blog posts. How Do You Audit Site Speed and Core Web Vitals? Test your key pages in PageSpeed Insights and check the Core Web Vitals report in Search Console. Google’s published “good” targets are Largest Contentful Paint under 2.5 seconds, Interaction to Next Paint under 200 milliseconds, and Cumulative Layout Shift under 0.1. The most common causes on Shopify are within your control: Too many apps: each can add scripts, and some leave code behind after you uninstall them Large images: uncompressed banners and product photos Heavy themes and sliders: animations that load before the page is usable Third-party scripts: chat widgets, pixels and pop-ups stacking up Fix the biggest items first: remove unused apps, compress images, and do not lazy-load the main image at the top of a page. If you want hands-on help, see our Shopify speed optimization service. How Do You Audit Content and Internal Links? Review every blog post and decide whether to update it, merge it with another, or remove it. A post is worth keeping if it brings traffic, supports a collection, or answers a real customer question. Update posts that rank on pages two or three, or that are out of date Merge posts that cover the same topic and compete with each other Remove or redirect thin posts that have no traffic, links or purpose Link each post to the most relevant collection, product or service page, using descriptive anchor text Our Shopify content marketing plan shows how to build content that feeds shoppers toward your collections, and our Shopify content marketing page explains how we support it. How Do You Audit Conversion and User Experience? Walk through your store on a phone as if you were a first-time buyer, and note every point of friction. Many stores get traffic but lose it at one unclear step. Check these on mobile: Is the navigation simple, and does every menu link go to the right page? Are shipping costs, delivery times and returns visible before checkout? Do your messages agree? For example, a banner and a product page should not state different free shipping thresholds.
How Australian Fashion and Beauty Brands Grow With Shopify SEO Services

Fashion and beauty are two of the most competitive categories in Australian ecommerce, and shoppers often compare you with global giants in the same browsing session. Organic search gives smaller brands a way to be found by people who are already looking for what they sell, without paying for every click. That is why more Shopify services for Australian brands now start with SEO before moving on to ads. If you run a fashion or beauty store in Australia, or you are a brand abroad planning to sell there, this guide explains what is different about the market, how to structure your store, how to plan SEO around the Australian calendar, and what to expect from Shopify services for Australian brands. Why Does SEO Matter So Much for Australian Fashion and Beauty Brands? SEO matters because it brings in shoppers who are ready to compare and buy, and it keeps working after a campaign ends. Paid ads stop when your budget stops, but a strong collection page or buying guide can bring visitors for months or years. For fashion and beauty, organic search helps in three ways: Discovery: shoppers search for things like “linen shirt dress” or “vitamin C serum” long before they know your brand Trust: ranking well for useful guides makes a newer brand feel established Margin: organic traffic reduces how much you depend on rising ad costs What Makes Australian Fashion and Beauty SEO Different? Australian SEO is different because of local language, pricing rules, distance, seasons and regulations. Plans copied from the US or UK often miss these details. Factor Why it matters What to do Local terms Australians use words like swimmers, bathers, togs, thongs and singlets Research how shoppers search on google.com.au and match your copy GST-inclusive pricing Shoppers expect to see the final price including 10% GST Keep product pages, ads and feeds consistent Distance Delivery to Perth or regional areas is slower and costlier Show delivery times and costs early, not only at checkout Opposite seasons Summer is December to February Publish seasonal content before each peak, not during it Local trust Many shoppers value “Australian owned” and local shipping Use these claims only if they are true, and back them with real reviews Regulations Consumer law, advertising rules and, for some beauty products, therapeutic goods rules Keep claims honest and ask your legal adviser to confirm details How Should Fashion Brands Structure Collections and Products for SEO? Fashion brands should build collections around how shoppers search, then support them with detailed product pages. Collections usually bring the most search traffic because they match broad, high-intent searches. Useful collection angles include: Category: dresses, jeans, activewear, swimwear Occasion: wedding guest, work wear, holiday Fabric or feature: linen, cotton, maternity, plus size Season: summer dresses, winter coats Each collection needs a short intro written for shoppers, a clean URL and links to related collections. Our guide to Shopify collection page SEO for large catalogs explains how to scale this across hundreds of products. On product pages, include fabric, fit, sizing guidance and care instructions, and write your own descriptions instead of copying supplier text. See our notes on Shopify product page SEO for what a strong page includes. Also check that variants such as size and colour point to one main product URL, so Google does not see duplicates. How Should Beauty Brands Approach Shopify SEO? Beauty brands should build around concerns, ingredients and routines, because that is how shoppers research. People search for solutions such as “serum for dry skin” more than for brand names. Concern and ingredient collections: for example acne-prone skin, sensitive skin, retinol or niacinamide Routine guides: simple “how to build a routine” content that links to your products Real reviews: honest customer reviews and clear ingredient lists build trust Careful claims: avoid medical or exaggerated promises, and note that advertising of some products, such as certain sunscreens and supplements, falls under therapeutic goods rules in Australia For category-specific plans, see our pages for fashion and apparel and beauty and skincare. How Do You Find the Right Keywords for the Australian Market? Start with how Australians actually search, not how overseas brands write. Use these steps: Check Google Search Console to see which queries already bring visitors from Australia. Research keywords in Semrush or Ahrefs with the location set to Australia. Look at google.com.au results to see what ranks and which words appear. List local terms such as swimmers, bathers, togs, thongs, singlets and trackpants, and note that some words vary by state. Map each keyword to one page so your pages do not compete with each other. Our Shopify keyword research page explains this process in more detail. Does Site Speed Matter for Australian Mobile Shoppers? Yes, because most shoppers browse fashion and beauty on their phones, and slow pages lose them quickly. Fashion stores are especially at risk because they use many large images. The most common fixes are compressing images, removing unused apps, limiting heavy sliders and choosing a lightweight theme. Check your Core Web Vitals in Google Search Console and PageSpeed Insights. If you want hands-on help, see our Shopify speed optimization service. How Can Content Support Fashion and Beauty SEO? Content captures shoppers earlier in their research and sends them toward your collections. Strong topics include buying guides, styling advice, ingredient explainers and seasonal edits. For example, imagine a Melbourne activewear brand with great products but only product pages. Adding guides such as how to choose the right leggings for different workouts, plus links to the matching collections, would give it many more ways to be found. Our Shopify content marketing plan shows how to build this step by step. How Should You Plan SEO Around the Australian Calendar? Plan SEO well before each shopping moment, because pages need time to be indexed and to build visibility. Key dates for fashion and beauty include: January and February: summer clearance and back-to-school May: Mother’s Day gifting June: end of financial year sales (EOFY) July and
Red Flags to Spot Before Hiring a Fashion E-commerce Agency

Fashion shoppers decide fast. They scroll, compare and leave if a page loads slowly or the sizing is unclear. That is why choosing a fashion e-commerce agency is one of the most important decisions a clothing brand makes. The right partner brings more traffic, better conversion and steady growth. The wrong one burns months of budget and leaves you with little to show for it. The problem is that most agency pitches sound the same. Everyone promises growth, strategy and results. This guide covers the red flags to spot before you sign, so you can separate agencies that understand fashion from those that only say they do. If you want to see what a Shopify-focused approach for apparel looks like, our fashion e-commerce agency page explains how we work with clothing brands. Why Fashion Is Different From Other Ecommerce Niches Fashion is not like selling a single gadget. You have seasonal collections, size and fit questions, many colour variants, visual-heavy pages and shoppers who browse on their phones. Competition is also crowded, with new brands launching all the time. An agency that treats your store like any other will miss these details. The red flags below will help you spot that early. Red Flag 1: They Guarantee Rankings or Sales No honest agency can guarantee position one on Google or a fixed revenue figure. Search engines change their algorithms, competitors move and demand shifts with the seasons. Promises like “first page in 30 days” usually mean the agency targets easy, low-value keywords, or uses shortcuts that can hurt you later. What to look for instead: realistic ranges, clear assumptions, and goals tied to business results such as organic revenue, not just rankings. Ask how they measure success and what they will do if results lag. Red Flag 2: No Real Fashion or Shopify Experience A general digital agency may know SEO but not size guides, variant handling, seasonal drops or lookbooks. Ask for fashion case studies and examples of work for clothing brands. Ask how they handle platform-specific details like collection structure, product variants and the effect of themes and apps on your store. Platform knowledge matters too. A team that works only on Shopify, like ours at RankMyShopify, understands its quirks in depth. A team spread across every platform may only know the surface. Red Flag 3: Reports Full of Vanity Metrics Impressions, followers and total traffic look impressive, but they do not pay your bills. Reports that skip orders, conversion rate and organic revenue are hiding the part that matters. Ask for a sample report before you sign. A good one shows keyword growth for category and product terms, organic sales, conversion rate and clear next steps. If an agency avoids sharing a sample, or says dashboards will come later, treat that as a warning. Red Flag 4: A Price Before Any Audit If an agency quotes a fixed package without looking at your store, it is selling a template, not a strategy. A brand with 80 products and a brand with several thousand need very different work, especially around collections and filters. A serious agency reviews your store, traffic and catalogue first. Large catalogues in particular bring problems like duplicate URLs and wasted crawl budget, which we cover in our guide to collection page SEO for large catalogs. If your agency cannot discuss issues like these, keep looking. Red Flag 5: SEO Only, With No Thought for Speed or Conversion Traffic that does not convert is expensive. If an agency talks only about keywords and never mentions page speed, product page layout, checkout or mobile experience, it is solving half the problem. Slow stores lose shoppers and can struggle in search. Strong agencies look at the full journey, from search result to purchase. You can see how these areas connect in our Shopify SEO, Shopify speed optimization and Shopify CRO services. Red Flag 6: Cheap Link Building and Shortcuts Be careful when an agency promises hundreds of links quickly for a low price. Mass directory links, private blog networks and unlabelled paid links can lead to penalties that take months to repair. Ask where links come from and request real examples. Good link building earns mentions from relevant, reputable sites and is transparent about the process. Our Shopify link building page explains the kind of approach that protects your brand. Red Flag 7: Long Contracts and Locked Assets A 12-month contract with no exit clause, or an agency that owns your ad accounts, analytics, Search Console or content, puts you at risk. You should own everything created for your store. Before signing, check the notice period, the exact deliverables each month, and who owns the accounts and assets. If the answers are vague, ask for them in writing. Red Flag 8: Pushing a Platform Change Without a Clear Reason Sometimes moving platforms makes sense. Often it does not. If an agency recommends replatforming in the first call, without reviewing your store, ask for the business case. What problem will it solve, what will it cost and what happens to your existing rankings? A fair agency explains the trade-offs honestly. Our comparison of Shopify vs WooCommerce vs BigCommerce for SEO shows how to weigh them without hype. Red Flag 9: No Content Plan Tied to Your Products Fashion brands have a lot to say: styling guides, size advice, care instructions and seasonal edits. An agency that publishes generic blog posts unrelated to your collections adds little value. Good content supports your category and product pages and answers real shopper questions. Our Shopify content marketing plan guide shows how to plan content that connects to revenue. Red Flag 10: You Cannot Tell Who Does the Work Beware of jargon-heavy calls, no named team members, slow replies and unclear outsourcing. You should know who works on your account, how often you will meet and how quickly they respond. An agency that hides its team usually hides its process too. Questions to Ask Before You Sign Use these
How SEO for an Online Shop Works on Shopify: Collections, Products and Speed

Most store owners treat SEO as a mystery. You publish products, wait, and hope Google sends traffic. On Shopify, that approach wastes the platform’s biggest advantage: its structure is clean and predictable once you know where to look. SEO for an online shop comes down to three pillars. Collections capture broad, high-intent searches. Products capture specific, ready-to-buy searches. Speed keeps both types of page ranking and converting. Get these three right and the rest of your strategy becomes much easier. This guide explains how each pillar works on Shopify, what to fix first, and where most stores lose rankings without noticing. How Shopify SEO Works: The Basics Search engines do three things: crawl your pages, understand what they are about, and decide whether they deserve to rank. Shopify handles some of the technical groundwork automatically. It generates an XML sitemap, adds canonical tags, creates SSL security by default, and gives you editable title tags and meta descriptions for every page. But the platform will not write your content, structure your catalogue or fix a slow theme for you. That work decides whether you rank. A useful way to think about it: Collection pages target category searches like “women’s running shoes”. Product pages target specific searches like “men’s trail running shoes waterproof size 10”. Blog content targets research-stage questions like “how to choose running shoes”. Site speed affects all of them. If you want a complete overview before going deeper, our Shopify SEO service page explains how we approach all of these layers for growing brands. Pillar 1: Collection Pages, Your Biggest SEO Opportunity Ask most Shopify store owners which pages drive their organic revenue, and they point to product pages. In practice, collection pages usually matter more. Why collections rank so well Shoppers who search for a category, such as “organic skincare sets” or “leather office bags”, are still comparing options. They want a page showing several choices. A collection page matches that intent exactly, and Google knows it. That is why category pages dominate the search results for broad ecommerce keywords. How to optimise a Shopify collection page 1. Choose one primary keyword per collection.Do not target the same phrase across multiple collections. Overlap creates keyword cannibalisation, where your own pages compete against each other. 2. Write a keyword-led title tag and meta description.Put the main keyword near the start of the title, for example “Organic Skincare Sets | Brand Name”. Write the meta description for humans, with a clear benefit and a reason to click. 3. Add useful copy above and below the product grid.A short intro of 50–100 words at the top helps users. A longer section of 200–400 words below the grid can cover buying advice, materials, sizing or use cases. Avoid keyword stuffing. Answer the questions a shopper would ask a sales assistant. 4. Use clear, descriptive collection names and handles.“Men’s Waterproof Jackets” beats “Collection 7” every time. Keep URL handles short and readable. 5. Link to related collections.Sub-collections, “shop by category” links and related-collection blocks pass authority around your site and help shoppers browse further. 6. Handle filters and pagination carefully.Filtered URLs and page-two results can create thin or duplicate pages. Make sure Shopify’s canonical tags are doing their job, and avoid letting every filter combination get indexed. Large catalogues bring extra challenges, such as thousands of near-duplicate URLs and wasted crawl budget. We cover this in depth in our guide to Shopify collection page SEO for large catalogs (1,000+ products), which is worth reading if your store is growing quickly. Pillar 2: Product Pages, Where Rankings Turn Into Revenue Collection pages bring shoppers into the category. Product pages close the sale. Product page SEO has to serve two audiences at once: Google and the buyer. Write unique product titles and descriptions The single biggest product SEO mistake is copying the manufacturer’s description. Hundreds of other stores use the same text, so Google has no reason to rank yours first. Instead: Write an original description for every product, even if it is only 100–150 words. Lead with the benefit, then cover specifications, materials, sizing and care. Include the product name, brand and one or two natural variations of the keyword. Use short paragraphs and bullet points so mobile shoppers can scan quickly. Optimise the technical elements Title tag: Product name plus a differentiator, such as “Merino Wool Jumper – Crew Neck | Brand”. Meta description: Mention price range, shipping or a key benefit. URL handle: Keep it short, such as /products/merino-crew-jumper. Image alt text: Describe what the image shows. This helps accessibility and image search. Image file names: Use “merino-crew-jumper-navy.jpg” instead of “IMG_4821.jpg”. Use structured data and reviews Shopify themes usually include basic product schema. Check that yours outputs price, availability and review ratings correctly. Review stars in search results can noticeably improve click-through rates, and reviews also add fresh, unique content to the page. Handle variants and out-of-stock products sensibly Most variants (size, colour) should live on one product page rather than separate URLs. For discontinued products, avoid deleting the page outright. Redirect it to the closest alternative or its parent collection so you keep the link equity. Build trust signals Shipping details, return policy, size guides, FAQs and clear pricing all reduce hesitation. They also overlap with conversion work, which is why strong SEO and conversion rate optimisation work best together. If your product pages get traffic but few sales, our Shopify CRO service is designed to fix exactly that gap. Pillar 3: Site Speed, the Quiet Ranking Factor You can write perfect collection and product copy and still lose to a faster competitor. Speed affects rankings through Google’s Core Web Vitals, and it affects revenue because impatient shoppers leave. The three Core Web Vitals to know Largest Contentful Paint (LCP): how quickly the main content appears. Aim for under 2.5 seconds. Interaction to Next Paint (INP): how quickly the page responds when someone taps or clicks. Aim for under 200 milliseconds. Cumulative Layout Shift (CLS): how much the layout jumps
Shopify vs WooCommerce vs BigCommerce: Which Platform Is Best for SEO?

Shopify is the best fit for most online stores that want strong SEO without heavy developer support, thanks to fast managed hosting, clean defaults and built-in sitemaps and canonical tags. WooCommerce gives the most technical freedom for content-led brands with developers. BigCommerce suits mid-size catalogues that want strong built-in controls. Execution matters more than the platform. Which Platform Is Best for SEO in 2026? No platform wins every case. Shopify wins on speed to results and low maintenance, WooCommerce wins on flexibility, and BigCommerce wins on built-in features. Here is the best ecommerce platform SEO comparison we use with clients as of October 2026. Factor Shopify WooCommerce BigCommerce Hosting and speed Managed, fast hosting included Depends on your host and plugins Managed hosting included URL control Fixed prefixes (/products/, /collections/) Fully customisable Clean, customisable URLs robots.txt Editable via robots.txt.liquid since 2021 Full control Strong built-in controls Structured data Product schema in most themes, extendable Via Yoast, Rank Math and similar Built into most themes Ecosystem Largest ecommerce app store Huge WordPress plugin pool Smaller app ecosystem Maintenance Low High (updates, security) Low Best for D2C brands that want growth without dev overhead Content-led stores with developers Mid-market and multi-storefront brands The market backs up Shopify’s momentum. As of 2026, Shopify holds roughly 29 to 30 percent of the US ecommerce platform market, ahead of WooCommerce at about 23 percent and BigCommerce at about 2 percent, according to a Brenton Way compilation of 2025 data. Estimates put live Shopify stores at around 5.6 million worldwide. Is Shopify better than WooCommerce for SEO? Shopify is better for most teams without in-house developers; WooCommerce is better for content-heavy stores with technical support. Shopify gives you fast hosting, automatic sitemaps and canonical tags out of the box. WooCommerce, running on WordPress, lets you control every URL and template, but you own speed, security and plugin conflicts. Is BigCommerce better than Shopify for SEO? BigCommerce is better in specific cases: mid-market catalogues, multi-storefront setups and teams that want fewer apps. It has strong built-in features and clean URLs. Shopify has the larger app ecosystem and a bigger pool of agencies and developers who know it deeply. How Does Shopify Handle SEO? Shopify handles the SEO basics automatically: managed hosting, an auto-generated sitemap, SSL, canonical tags and editable titles and meta descriptions. Its weak points are a fixed URL structure and some duplicate-URL quirks that a specialist can fix. Strengths of Shopify SEO: Fast, reliable hosting with a CDN included, which supports Core Web Vitals Automatic XML sitemap and canonical tags Largest app ecosystem for schema, reviews, redirects and speed Native support for Shopify Markets, which helps stores selling in India, the USA, the UK, Australia and Canada Can you edit robots.txt on Shopify? Yes. Shopify has allowed robots.txt customisation through a robots.txt.liquid theme template since June 2021. Many older articles still say it is locked, which is now out of date. Use it to block thin tag and filter URLs, and always test in Google Search Console. Does Shopify create duplicate content? Shopify can create duplicate product URLs, but it normally canonicalises them. A product can load at /products/blue-shirt and at /collections/summer/products/blue-shirt. Shopify points the canonical tag to the clean /products/ URL, yet problems appear when theme edits or apps override this, or when collection pages link to the longer path. Tagged collection URLs can also lack a canonical. Our team checks these with Screaming Frog and Google Search Console in every Shopify SEO audit. For example: a Shopify fashion store in India with 5,000 products and no technical SEO in place will typically show duplicate collection paths, heavy app scripts slowing mobile pages, and thin collection descriptions. These are exactly the issues a Shopify-specialist audit from RankMyShopify targets first. How Does WooCommerce Handle SEO? WooCommerce gives the deepest SEO control of the three, but it is a plugin on WordPress, so performance depends on how well you build and maintain it. It is free to install, yet hosting, premium plugins and developer time are real costs. Strengths of WooCommerce SEO: Total control over URLs, templates, category copy and internal linking Mature SEO plugins such as Yoast SEO and Rank Math Best-in-class blogging and content marketing through WordPress Trade-offs: Core Web Vitals depend on your host, theme and plugin stack Plugin updates, security and conflicts need ongoing discipline One 2026 comparison suggests premium plugins often cost around $49 to $299 per year each If your store is publishing content at high volume and you have a WordPress developer on staff, WooCommerce is a serious option. If a marketing lead without WordPress experience runs the store, Shopify is usually easier to run well. How Does BigCommerce Handle SEO? BigCommerce handles SEO well out of the box, with clean URLs, strong built-in features and good support for multiple storefronts. It is often overlooked, and some comparisons call it the strongest SaaS platform on built-in SEO. Strengths of BigCommerce SEO: Clean URL control and strong native tools without many apps No transaction fees on its plans, which helps margins Good fit for mid-market catalogues and multi-storefront brands Trade-offs: Smaller app and developer ecosystem than Shopify or WooCommerce Fewer agencies specialise in it Plan names changed on 1 June 2026 (Standard is now Core, Plus is Growth, Pro is Scale, Enterprise is Performance), so older guides can mislead you Which Platform Is Best for Site Speed and Core Web Vitals? Managed platforms are easier to keep fast. Shopify and BigCommerce include hosting, so your speed depends mostly on your theme and apps. WooCommerce speed depends entirely on your stack. On Shopify, the most common speed problem we see is app bloat: too many apps injecting scripts. Removing unused apps, compressing images and choosing a lightweight theme usually moves the needle. Google measures Core Web Vitals as part of its page experience signals, so this matters for organic traffic. How Much Do Shopify, WooCommerce and BigCommerce Cost in 2026? Shopify and BigCommerce charge a monthly plan fee, while WooCommerce
Content That Sells: A Step-by-Step Shopify Content Marketing Plan for Your Online Store

Shoppers research before they buy, and the stores that answer their questions early often win the sale. Shopify content marketing is the process of creating helpful content, such as blog posts, buying guides, and collection page copy, that attracts shoppers from search and guides them to your products. A simple plan has seven steps: set goals, research keywords, choose content types, write, optimize, promote, and measure. Each step ties content to a page that can sell, so traffic turns into orders instead of stopping at a blog view. Most stores see results over months, not days, because search engines need time to find, test, and rank new pages. What Is Shopify Content Marketing and Why Does It Drive Sales? Shopify content marketing means publishing useful content that answers shopper questions and leads them to your products, without paying for every visit. It works because shoppers research before they buy, and content puts your store in front of them at that stage. Unlike an ad, a well-built page keeps earning after you publish it. Shopify has a built-in blog engine that is simpler than WordPress but capable enough for most stores. Yet many brands publish without a plan. One 2026 compilation of Content Marketing Institute figures reports that only 37% of B2C marketers have a documented content strategy, so a written plan is a real advantage. Google also says its ranking systems aim to prioritize helpful, reliable, people-first content, which is the standard every step below follows. For stores in India, the USA, the UK, Australia, and Canada, the approach is the same. Step 1: How Do You Set Goals and Understand Your Shopify Customers? Start by choosing one business goal, such as more organic visits to your best-margin collections, and define the shopper you want to reach. A clear goal keeps your Shopify content marketing focused on sales, not just traffic. List your top products and collections by profit. Read reviews and support questions to find what buyers ask before purchasing. Note the objections that stop sales, such as sizing, ingredients, or compatibility. Set a six-month target, such as growth in organic sessions to collection pages. Shopify Community threads show owners asking whether blogging is worth it for their niche. The honest answer starts with a goal and a customer, not a posting schedule. Step 2: How Do You Build an Ecommerce SEO Content Strategy? Good Shopify content marketing begins with research, not writing. An ecommerce SEO content strategy maps shopper searches to pages: broad category terms to collection pages, and specific questions to blog posts and guides. Use Google Search Console, Semrush, or Ahrefs to find searches your store already appears for and gaps your competitors fill. Match intent: “Best”, “vs”, and “how to choose” searches suit guides and comparisons. Use long-tail terms: Specific phrases are easier to rank for and closer to a purchase. Build clusters: Pair one in-depth guide with supporting posts that link to related collections. Plan a calendar: Decide topics for the next three months so publishing stays steady. Many stores run this stage alongside Shopify SEO services so keyword mapping, technical fixes, and content work together. [Internal link: Shopify SEO audit] Step 3: Which Content Types Should a Shopify Store Create First? Start with collection page copy and buying guides, because they sit closest to the purchase decision. Then add research-stage posts and visual content as your calendar grows. Content Type Shopper Stage Best For Example Collection page copy Ready to buy Category rankings Intro and buying tips for a fashion collection Buying guides Comparing Commercial searches How to choose skincare for dry skin (beauty) How-to posts Researching Early traffic Styling a console table (home decor) Comparison posts Deciding High-intent searches Wireless earbuds versus headphones (electronics) Product descriptions Buying Conversion Original specs and use cases Visual guides and video Any stage Engagement Lookbooks, demos, workout guides (sports, health and wellness) Step 4: How Do You Write and Publish Content That Ranks? Strong Shopify content marketing writes for the reader first. Answer the question in the opening lines, use clear headings, and add original detail such as sizing, materials, testing notes, and customer feedback. Use one primary topic per page. Keep paragraphs short and scannable on mobile. Add images with descriptive alt text. Link to the most relevant collection or product page. Publish on a steady schedule you can keep. When Do Shopify Blog Writing Services Make Sense? Shopify blog writing services make sense when your team lacks the time or writing skill to publish consistently. A good provider researches your products, follows keyword and intent briefs, and delivers articles you review for accuracy and brand voice. Look for writers who understand ecommerce, not only general blogging. Step 5: How Does Shopify Content Optimization Turn Visitors Into Buyers? Shopify content optimization connects each page to a next step, so readers move from information to products. A strong article with no path to purchase earns traffic but little revenue. Titles and descriptions: Lead with the topic and write for clicks. Internal links: Link from posts to collections and products, and back again. Calls to action: Add a clear next step, such as shop the collection. Speed and mobile: Compress images and check Core Web Vitals. Structured data: Add Article, FAQ, or Product schema where it fits. Blog tag pages: Review tag URLs and canonical tags for thin or duplicate pages. Refresh old posts: Update facts, links, and examples each quarter. If you sell in several countries through Shopify Markets, create Shopify content marketing assets that reflect each region’s language and search habits. [Internal link: Shopify content optimization] Step 6: How Do You Promote Your Content? Promote your Shopify content marketing through search and paid channels together. Organic rankings take time, so combining channels keeps traffic moving while pages mature. Shopify SEO services: Build links and digital PR that raise your pages’ authority. Shopify Google Ads management: Promote key guides and collections to high-intent searches while organic rankings grow. [Internal link: Shopify Google Ads management] Shopify